
In Excel, “Font Size” refers to the measurement of the size of the characters or text within a cell. It determines how large or small the text appears. You can change this size to make the text easier to read or to improve the look of your Excel sheet. Adjusting font size is a common task when you want to highlight specific text, create headings or make your data look better.
You can change the text size for single cells, whole columns or rows or even for the entire Excel sheet using various methods. Here’s how to do it:
1: Ribbon (Home Tab):
- Select the cell or cells whose font size you want to change.
- Go to the “Home” tab in the Excel ribbon.

- In the “Font” group, locate the “Font Size” dropdown list.
- Click on the dropdown arrow to open the list.
- Choose the desired font size from the list. Alternatively, you can also type the font size directly into the box and press “Enter.”

- The selected font size will be applied to the selected cells.
2: Format Cells Dialog Box:
- Select the cell or cells you want to change the font size for.

- Right-click on the selected cells and choose “Format Cells” from the context menu.
- In the “Format Cells” dialog box, go to the “Font” tab.
- In the “Size” field, type the desired font size or select the font size from the list.

- Click “OK” to apply the new font size.
3: “Increase Font Size” and “Decrease Font Size” icons on the Home Tab:
- Select the cell or range of cells whose font size you want to change.
- Go to the “Home” tab in the Excel ribbon.
- In the “Font” group, look for the “Increase Font Size” and “Decrease Font Size” icons. These icons typically appear as the letter “A”s with an upward or downward arrow next to them.
- The “Increase Font Size” icon usually has an upward-pointing arrow.
- The “Decrease Font Size” icon usually has a downward-pointing arrow.
- Click the “Increase Font Size” icon (upward-pointing arrow) to make the text larger or click the “Decrease Font Size” icon (downward-pointing arrow) to make it smaller.
- Keep clicking the icons until you achieve the desired font size.
4: Formula Bar
- Select the cell containing the text you want to change.
- Click in the formula bar.
- Highlight the text whose font size you want to change.
- A mini toolbar will appear near your cursor.
- Use the “Font Size” dropdown list to select the desired font size.
- You can also use the “Increase Font Size” and “Decrease Font Size” icons until you achieve the desired font size.

Note: “With this method, you can change the font size for a single cell, but it doesn’t apply to multiple cells at once.”
5: Excel toolbar:
- Start by clicking on the cell that contains the text you want to change.
- Highlight the text whose font size you want to change.
- A mini toolbar will appear near your cursor.

- If you want to change the font size for a group of cells, simply select those cells and right-click. A mini toolbar will appear near your cursor along with the context menu.
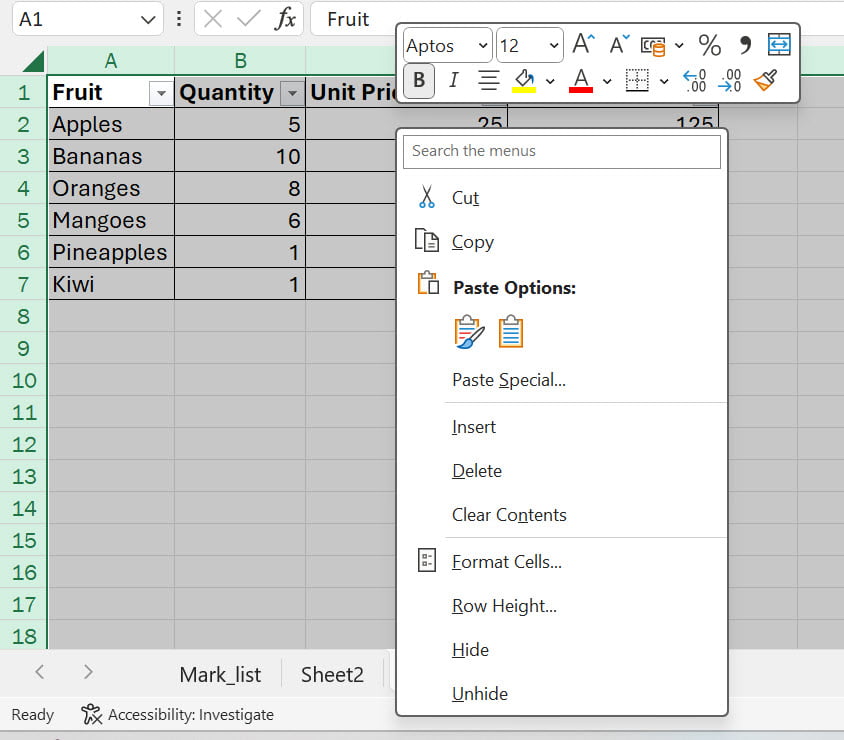
- Use the “Font Size” dropdown list to select the desired font size.
- Alternatively, you can use the “Increase Font Size” and “Decrease Font Size” icons until the text reaches the desired font size.
6: Quick Access Toolbar (Custom Shortcut):
If you frequently change font size, you can add the “Font Size” command to the Quick Access Toolbar for easy access:
- Click the small down arrow at the end of the Quick Access Toolbar (usually located above the Excel ribbon).

- Choose “More Commands.”
- In the Excel Options dialog box, find “Font Size” in the list of commands and add to your Quick Access Toolbar.

- Now, you can change the font size by selecting the cell or range of cells and then selecting the desired font size from the “Font Size” drop-down list in the Quick Access Toolbar.

These methods provide various ways to adjust the font size in Excel, allowing you to choose the one that best suits your workflow.
Remember that you can adjust the font size for individual cells, entire columns, rows, or even the entire worksheet. Follow these steps to change font size in Excel effortlessly:
Individual Cells:
- Select the cell or cells you want to change the font size for by clicking on them.
- Apply the desired font size using any of the above methods.
Columns or Rows:
- Click on the lettered column header (e.g., “A,” “B,” “C”) to select an entire column or the numbered row header (e.g., “1,” “2,” “3”) to select an entire row.
- Now apply the new font size to the selected column or row.

For an Entire Worksheet:
- Simply click the small square between the row and column headers. This will select the entire worksheet.
- Adjust the font size according to your preferences.

By learning these methods, you can easily make text look better in Excel, so it’s easier to read and looks nicer.
Discover more from Excellopedia
Subscribe to get the latest posts sent to your email.