Sometimes a user needs to add and delete rows while working in Excel to manage data efficiently. Excel offers various methods including easy commands, keyboard and mouse shortcuts to add and remove Rows in Excel. In this tutorial, we will explore different ways to add and delete rows in an Excel worksheet along with essential tips to keep in mind.
What is a Row in Excel?
A row is a horizontal series of cells in a spreadsheet. A single worksheet contains a total of 1048576 rows. Rows are identified by numbers. Each row has its own identification number starting from 1 to 1048576.
Things to remember before adding a row:
- A new row will always be inserted above the row which you’ve selected.
- If you want to add more rows at a time, you need to select the same no of rows. For example, if you want to insert 5 blank rows in a sheet you need to select 5 rows and use the command. Now 5 blank rows will be added above the selected rows.
How to add a row in an Excel worksheet?
There are so many ways to insert a row in an Excel worksheet and let’s check them one by one.
Add a Row Using Mouse:
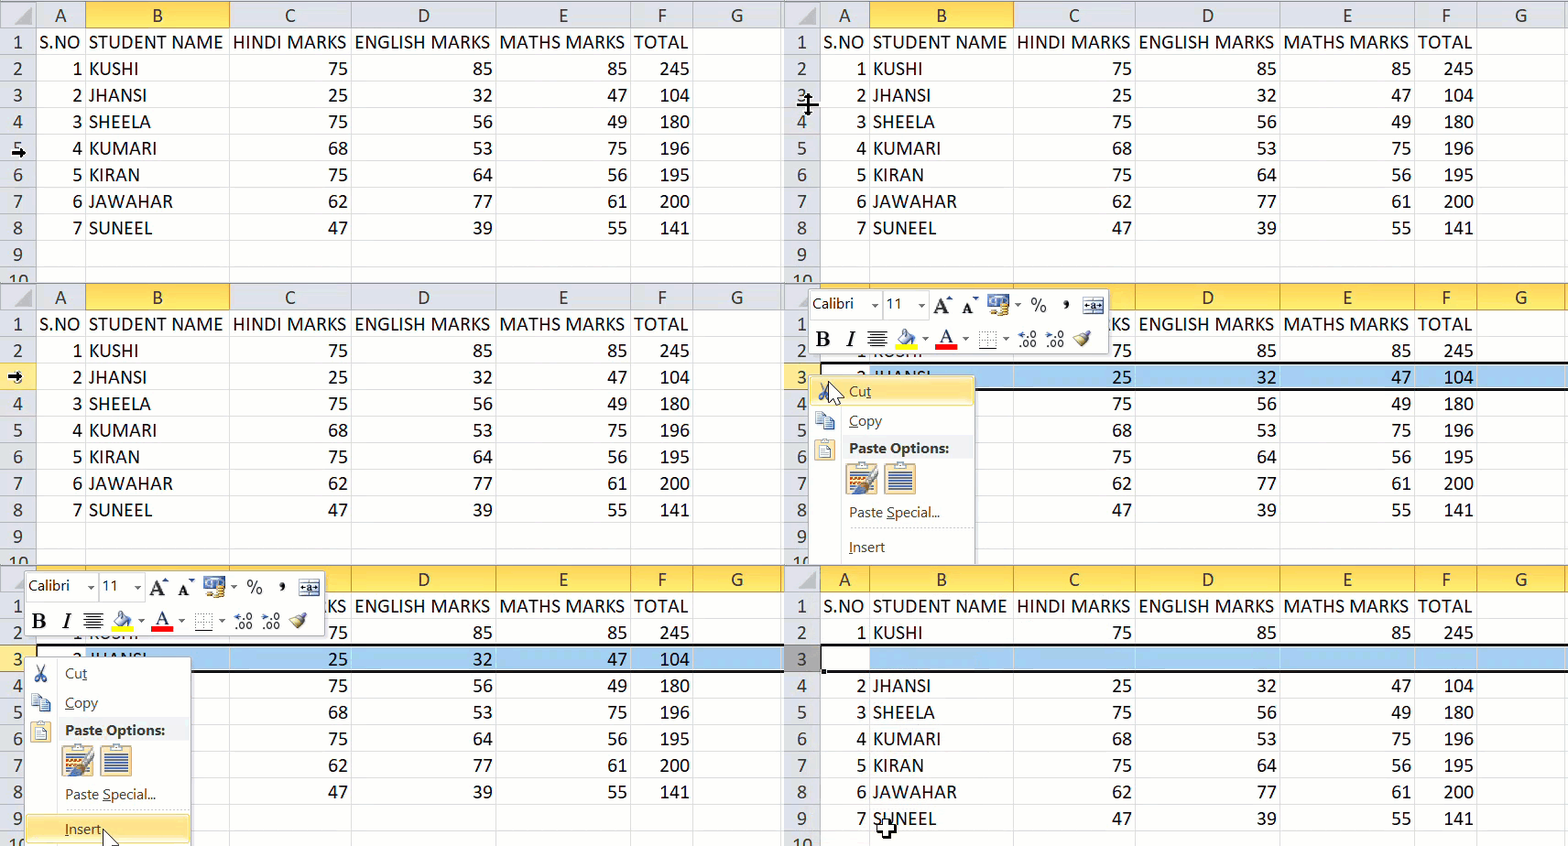
1: In an Excel worksheet, first you need to select a row where you want to add a new blank row above that. Hover the mouse on the row number and wait till the arrow appears and click on that number to select that row or simply click on any cell on the row and press Ctrl + Spacebar to select the row.
2: Now simply click the mouse right button to open the menu and click on Insert. An empty row will be added above the selected row.

Add a Row Using Insert option:
1: In an Excel worksheet, select any cell within the row.
2: Navigate to the Home tab on the ribbon and click on the Insert drop-down button.
3: Now click on Insert sheet rows to add a new row.

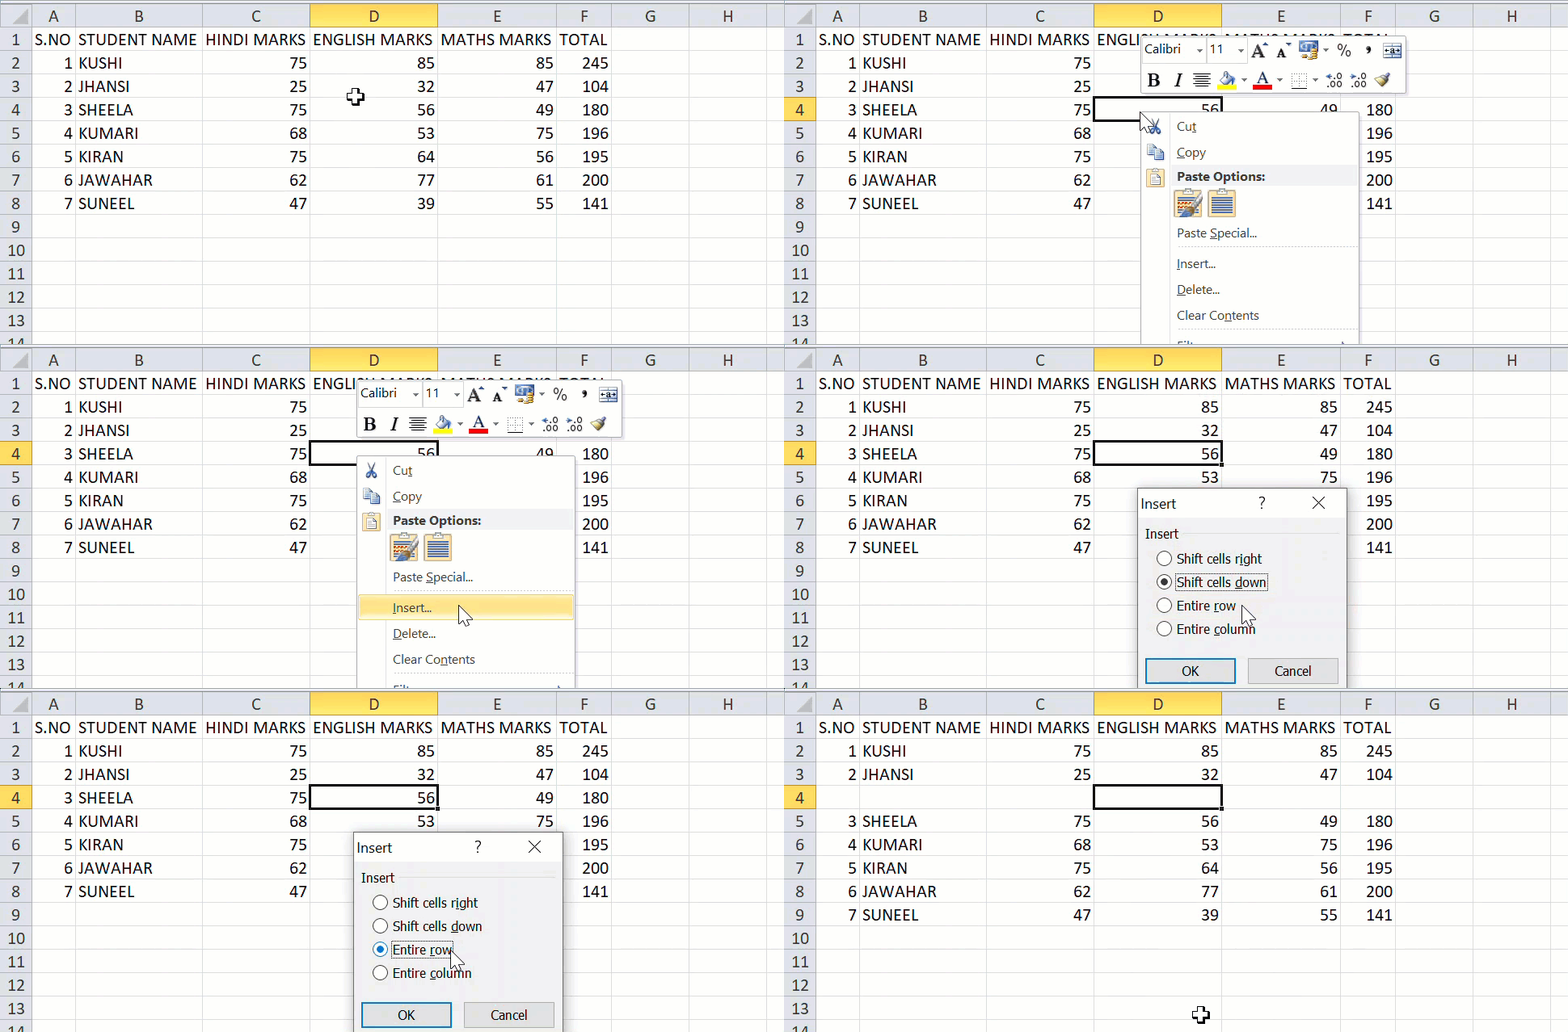
You can also add a row using the mouse insert option. Simply select a cell and click the mouse right button to open the menu. Now click on the Insert option. An insert dialogue box will pop up. Select the Entire row option to add an empty row above the selected row.

Add A Row Using A Keyboard Shortcut:
1: First, select a row by clicking on its row number or click on any cell within the row and press Shift + Spacebar to select the row.
2: Now press the Ctrl + + key if you’re using a keyboard with a number pad or else press Ctrl + Shift + += button. An empty row will be added above the selected row.
check these other useful Excel Keyboard shortcuts.
How to delete rows in an Excel worksheet?
Delete a Row Using A Keyboard Shortcut:
First, select a row that you want to delete and press the ctrl + – key if you’re using a keyboard with a number pad or else press the Ctrl + _- button. Now the selected row will be deleted.
Delete a Row Using Mouse:
Select a row and simply click the mouse right button to open the menu and click on Delete. The selected row will be deleted.

Delete a Row Using the Delete option:
1: Select the row you wish to delete.
2: Navigate to the Home tab on the ribbon and click on the Delete drop-down button.
3: Now click on Delete sheet rows to delete the selected row.

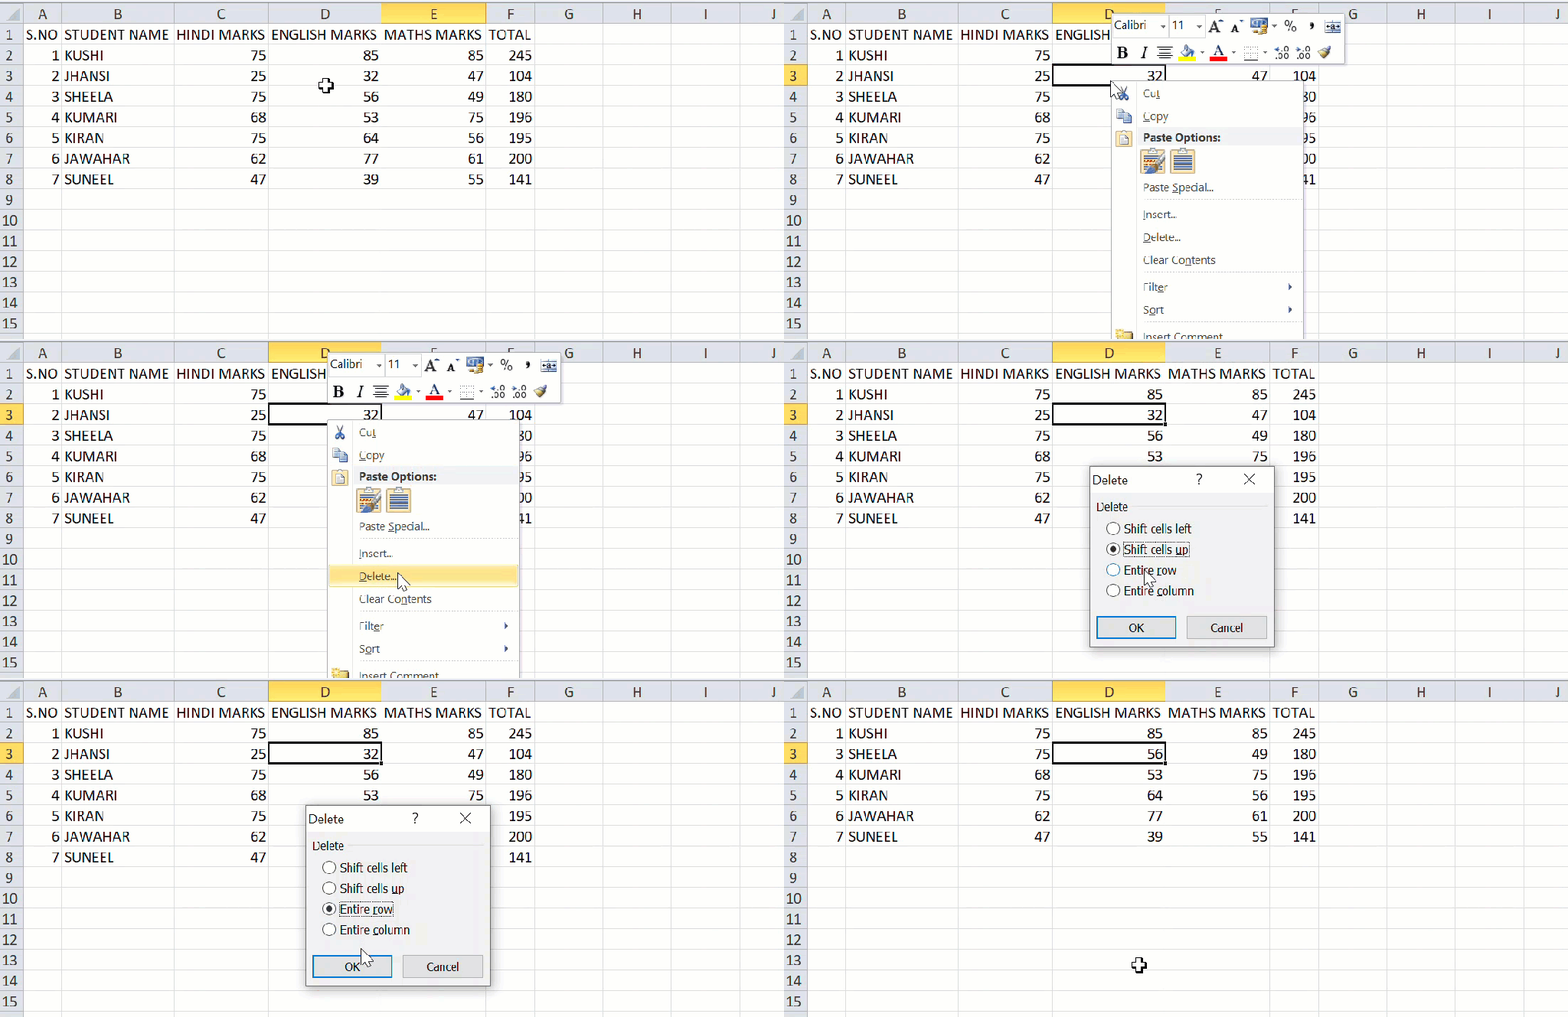
You can also delete the row using the mouse Delete option. Simply select a cell and click the mouse right button to open the menu. Now click on the Delete option. A Delete dialogue box will pop up. Select the Entire row option to delete the present row.

Learning how to add and delete Rows in Excel is essential for keeping your data organized. By using these methods and important tips you’ll be able to manage your data in Excel more efficiently.
Video Tutorial:
Discover more from Excellopedia
Subscribe to get the latest posts sent to your email.
